WeichertLabs
Windows Server CORE Template Setup
This step-by-step guide shows you how to prepare a Windows Server Core VM for templating in Proxmox VE—starting right after the installation is complete.
What you’ll learn:
• How to install VirtIO drivers
• How to configure time zone and updates
• How to run Sysprep for generalization
• How to convert your VM to a reusable template
This guide is ideal for anyone who regularly deploys Windows Server Core VMs in Proxmox and wants to save time using a pre-configured base image.
✴
Please note: All guides and scripts are provided for educational purposes. Always review and understand any code before running it – especially with administrative privileges. Your system, your responsibility.
✴
Use at your own risk: While every effort is made to ensure accuracy, I cannot take responsibility for issues caused by applying tutorials or scripts. Test in a safe environment before using in production.

Step 1 – Install Virtio Drivers
- After installation, start by setting the administrator password.
- Select option 15 to enter PowerShell.
- Navigate to the VirtIO driver disk. It’s usually labeled D drive.
- Type ‘dir’ to list files and confirm you’re in the correct disk.
- Start the VirtIO installer by typing virtio-win-guest-tools.exe and hit enter.
- Follow the installation prompts to install drivers for Windows.
- Once complete, type ‘exit’ to return to the main menu.
Screenshots & Code Snippets


Step 2 – Change TimeZone
- Select option 9 (Date and Time).
- Click ‘Change time zone’, choose your zone, click OK twice.
Screenshots & Code Snippets


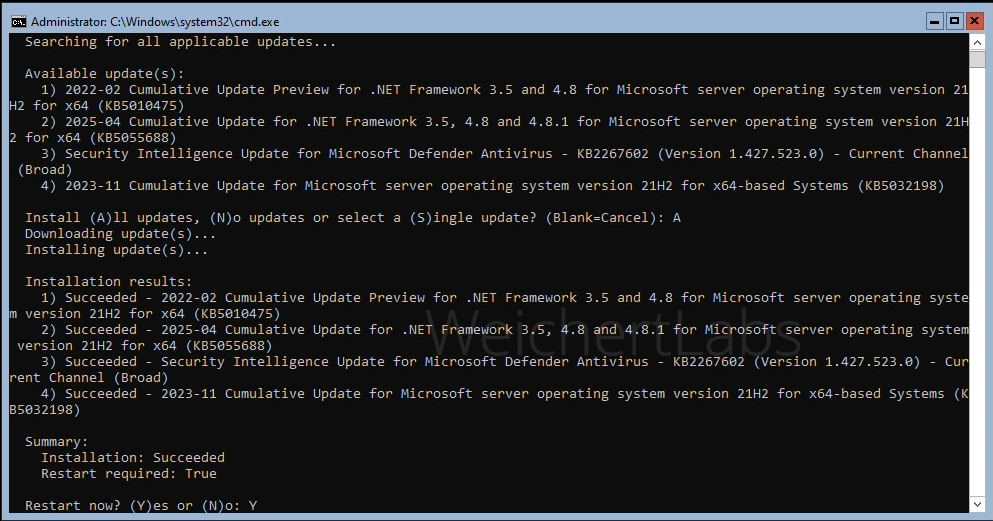
Step 3 – Update System
- Select option 5 (Update Settings). Choose A for automatic updates.
- From the main menu, choose option 6 (Install updates).
- Select option 1 (All qualify updates).
- Wait while the system checks for updates.
- When prompted, choose A to install all updates.
- Wait for updates to complete. When asked to restart, choose Yes.
- The restart may take a moment.
- Log in again.
- Go to option 6 again and check for more updates.
Screenshots & Code Snippets


Step 4 – Sysprep
- Select option 15 (PowerShell).
- Navigate to C:\Windows\System32\Sysprep\ folder.
- Run sysprep.exe by typing .\sysprep.exe and hit enter.
- Select ‘Generalize’ and ‘Shutdown’, then press OK.
- Wait for Windows Server to shut down.
Screenshots & Code Snippets


Step 5 – Remove CD & Create Template
- Select the VM in Proxmox and go to the Hardware tab.
- Remove the lower CD/DVD Drive. Click ‘Remove’, then ‘Yes’.
- Edit the remaining CD/DVD Drive, choose ‘Do not use any media’, and click OK.
- Right-click the VM and choose ‘Convert to template’.
- Click ‘Yes’. Your Windows Server Core template is ready.
Screenshots & Code Snippets


Create a Windows Server Core Template in Proxmox (Video Guide)
This video demonstrates the post-installation setup of a Windows Server Core in Proxmox VE. It begins right after the OS installation is complete and walks through configuring the system, installing VirtIO drivers, applying updates, running Sysprep, and converting the VM into a reusable Proxmox template for future deployments.